|
|
Post by Neil Sutton on Aug 4, 2006 12:46:50 GMT
How easy is to remove the rear bumper on a F ?
Managed to reverse the F in to one of the bollards outside my house last night while trying to avoid my other car and next doors motor. Concrete Bollards have only been there about 7 years...
Anyway, number plate is cracked as is the bumper, and I'm wondering how easy it will be to remove it and try and repair it, as I don't fancy paying out for a new one (£250 +VAT + fitting).
|
|
PinkJay
Running out of stars!
 The PINKSIDE - 'stronger it is' - but you can't beat Black Leather - LOL.
Posts: 1,685
|
Post by PinkJay on Aug 4, 2006 13:12:58 GMT
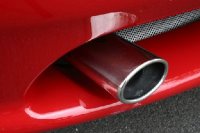
Fairly easy to remove - the only prob i've had is with the 2 large bolts that go through above the exhaust outlets.
There are captive nuts attached to the plates on the car and mine had rusted solid. I span them off eventually and had to re-fabricate new plates to attach Stainless bolts and nuts through.
Same old story really - Rover using cheap bolts and parts as usual.
|
|
|
|
Post by Neil Sutton on Aug 4, 2006 15:31:14 GMT
Oh great... Think I might put up with cracked bumper for a bit !! Need to have a look at it in the daylight when I get home from work.
|
|
|
|
Post by Davidt6dcm on Aug 4, 2006 17:59:28 GMT
|
|
|
|
Post by Emma Jackman on Aug 4, 2006 18:32:11 GMT
Sorry the hear that Neil, I know all about knackered rear bumpers! Keep checking at ebay, I managed to get mine for £41 including postage. Still haven't had it reprayed though.
|
|
|
|
Post by Scarlet Fever on Aug 4, 2006 21:10:34 GMT
Some more info from the SFforever site... 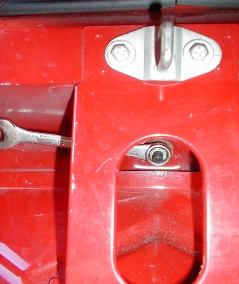 "In the boot there are three bolts that retain the rear bumper. To remove the retaining nuts you will need a 13mm spanner and a lot of patience! As you can see from the picture the central one is a pain to get to, furthermore, the length of the bolt precludes the use of a socket." EDIT: Use a deep socket and an extension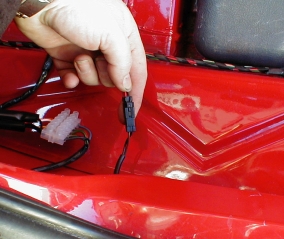 "The rear bumper houses a pair of lamps to illuminate the rear numberplate - these need disconnecting before the bumper can be removed. It is as simple as unclipping the two multiplugs in the boot and feeding the gromet and wiring through the hole in the rear panel." 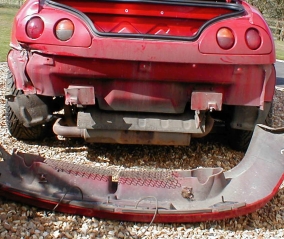 "I also had a go at the pair of 17mm bolts that fix the bumper up to the underside of the rear box sections. What I didn't mention was that I had trouble undoing these bolts and suspected that I had sheared the mounting plates! This was confirmed today when I completed the removal. I was stopped last week by the fact that I couldn't get to the retaining screws in the rear wheelarch without jacking the car up. This week I came to the conclusion that as the rear bumper was damaged beyond repair anyway it didn't matter if I damaged it further undoing these screws. :-) In addition to the three 'boot bolts' and the pair of 17mm main bolts, the bumper is retained with a further three screws in each wheel arch, 2 that join the wheelarch liner to the bumper (these were the tricky ones) and a further screw that fixes upwards into the underside of the rear wing. All are Philips head and I was able to undo Scarlet's with a 'dumpy' screwdriver and a bit of brute force! More details on removing the rear bumper can be found on Scarlet's Web" EDIT: See Dave's post above for a link 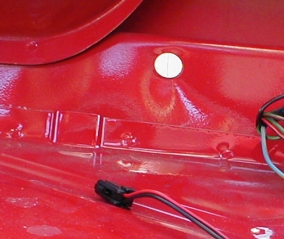 "Although disconnected last week, the wiring was still through to the boot compartment. I pushed the rubber grommets through the hole in the bodywork (shown in the picture) and then fed the wiring out so that it wouldn't become damaged when the bumper was removed." 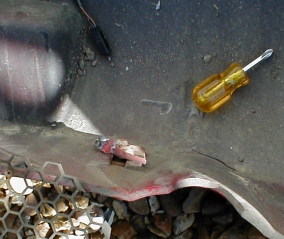 "The main bolts that secure the bumper to the car fix to a pair of box sections that perform the same job as the front armature in an impact, i.e. progressive collapse. They have captive nuts in the underside to take the 17mm bolts fixed to a small metal plate that I managed to completely shear off of both box setions. Actually this made the job of removing the bumper easier as I didn't need to undo the bolts! The picture shows one of the bolts and the sheared plate still attached to the bumper. It also shows the rear grille I fitted to the bumper a few years back, this has survived and will be re-used." 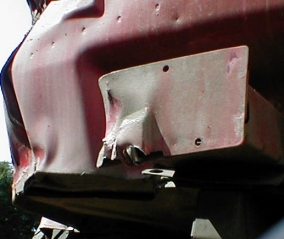 "One of these box sections was damaged in the accident and I damaged them both trying to undo the main bolts, so they both need replacing with new items, fortunately they are bolt on items, so out came the trusty socket set again... :-)" To remove crush boxes... 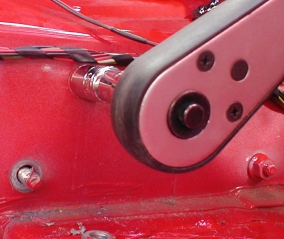 "Each of the 2 box sections is fixed through the rear boot wall with 4 bolts. The bolts have a 10mm head but the nuts inside the boot compartment are 13mm. I used a 10mm spanner on the outside to hold the bolt steady and a 13mm socket inside the boot to undo the nuts. The picture shows the nuts inside the boot - personally I am amazed this photo came out as I took it 'blind' :-)" 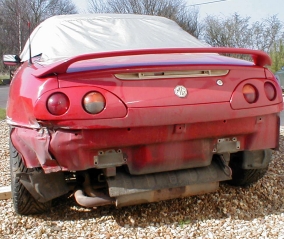 |
|
|
|
Post by Neil Sutton on Aug 4, 2006 21:55:09 GMT
Thanks for that, it doesn't look too difficult too do  Might see if I can pick up a Solar Red one on Ebay. |
|
|
|
Post by Adrian Clifford on Aug 5, 2006 8:18:55 GMT
Neil, as you say it is not too difficult at all, but please be aware the two 17mm bolts will probably be siezed solid, unless you are lucky. May I suggest you get some Plus- Gas or the like sprayed on there early and see if you can slacken them off ready for removal when you get your bumper. Good luck, hope you find one soon, sorry to hear about your accident too.
|
|
|
|
Post by jupilerman on Aug 6, 2006 10:39:58 GMT
Yep. Those bolts sheared off on mine two years ago. Soak them very well, let it rest overnight is possible and unbolt the next day. I bought a new box, I believe prices was in the £ 50´s.
Too long ago to be sure. So better safe then sorry. Replace the bolts by Stainless items. Just in case you´d want to remove the bumper again for some other reason.
|
|